Oil Cooler Elimination:
This is a critical step when installing a new, remanufactured
or rebuilt engine.
The
successful installation of a remanufactured engine
has a great deal to do with the cleanliness of the
job.
Thoroughly cleaning the oil pump screen, oil pan, valve
cover(s), manifolds and related parts is an absolute
must.
Some vehicles came from the factory with external engine
oil coolers. There's a few different styles
of oil coolers out there, but regardless of
the design, they do a great job of trapping grit,
bearing material and other particles from the worn
out engine that's being replaced.
For this reason all oil coolers must be replaced
or eliminated when installing a remanufactured engine.
The question is often raised as to why this is, and the
answer is simple. The new engine with higher
oil pressure, on start up will dislodge trapped debris
in the oil cooler and force it into the bearings of
the new engine. This will cause premature wear
in most cases, or sometimes an instant failure.
Replacing an engine oil cooler can sometimes be very costly
but on some models it's possible to eliminate the
cooler instead.
|
Here are some tips for eliminating
the oil cooler on a 4WD Chevrolet pick-up with independent
front suspension and a 350 or a 305 V8.
Note:
Click on the images to see the detailed photo pages...
|
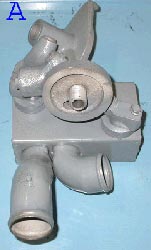
Step
1
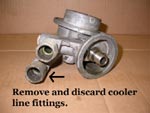
Remove and discard
oil cooler fittings.
|
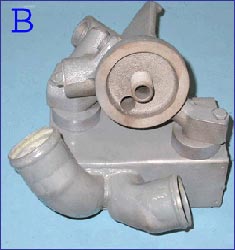
Step
2
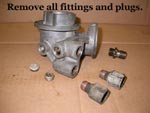
Remove all fittings
and
plugs.
|
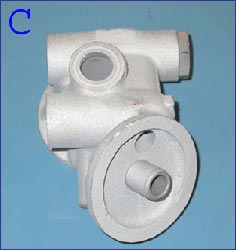
Step
3
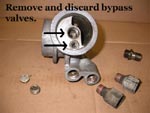
Remove and discard
oil bypass valves.
|
|
|
|
Step
4
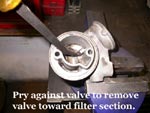
Pry against cooler bypass
valve to remove toward
filter section.
|
Step
5
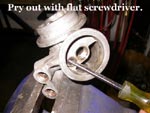
Pry
out filter bypass
with a flat screwdriver.
|
Step
6
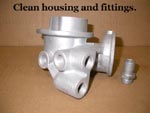
Clean the housing and fittings.
|
|
|
|
Step
7
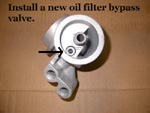
Install a new
oil filter bypass. |
Step
8
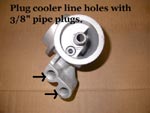
Plug oil cooler line holes
with 3/8" pipe plug fittings.
|
Step
9
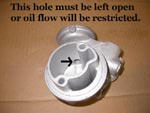
This hole must be left open.
Do not install a bypass or
oil flow will be restricted.
|